
Welcome to the Frida Thermometer manual․ This digital thermometer offers precise temperature measurement‚ ideal for indoor or outdoor use․ This guide will help you understand its features‚ installation‚ and operation․
1․1 Overview of the Frida Thermometer
The Frida Thermometer is a cutting-edge digital device designed for precise temperature measurement․ It combines accuracy‚ reliability‚ and ease of use‚ making it suitable for various environments․ The thermometer features a compact‚ lightweight design and a clear LCD display for easy readability․ Its user-friendly interface allows for seamless operation‚ while customizable alerts ensure you stay informed about temperature changes․ Whether for home‚ office‚ or outdoor use‚ the Frida Thermometer is an efficient and energy-saving solution for monitoring temperatures effectively․ This manual will guide you through its setup‚ features‚ and optimal use․
1․2 Key Features and Benefits
The Frida Thermometer offers high accuracy with a wide temperature range‚ ensuring reliable readings in various conditions․ Its wireless connectivity allows for remote monitoring‚ while the large‚ backlit LCD display enhances visibility․ The device is energy-efficient‚ with a long battery life‚ and includes customizable alerts for temperature thresholds․ These features make it ideal for both indoor and outdoor applications‚ providing users with precise and convenient temperature monitoring․ The thermometer’s durability and user-friendly design further enhance its versatility and performance in different environments․

Safety Precautions
Always handle the Frida Thermometer with care to avoid damage or injury․ Follow all safety guidelines to ensure proper usage and maintain accuracy in temperature readings․
2․1 General Safety Guidelines
Before using the Frida Thermometer‚ ensure you read all safety guidelines carefully․ Avoid exposing the device to extreme temperatures‚ moisture‚ or physical stress․ Keep it out of reach of children and pets․ Do not submerge the thermometer in water or expose it to direct sunlight for prolonged periods․ Use only the recommended batteries and avoid mixing old and new ones․ Follow proper handling techniques to prevent damage and ensure accurate readings․ Regularly inspect the device for any signs of wear or damage․ Always store the thermometer in a dry‚ cool place when not in use․

2․2 Handling the Thermometer
To ensure proper function and longevity‚ handle the Frida Thermometer with care․ Avoid touching the sensor to prevent contamination or damage․ Clean the device with a soft cloth and mild soap solution if necessary․ Do not expose the thermometer to extreme temperatures or drop it‚ as this may cause malfunction․ Keep the device away from children and pets to avoid accidental damage․ Always use the recommended batteries and avoid over-tightening the battery compartment․ Store the thermometer in its protective case when not in use to prevent scratches or damage․ Refer to this manual for specific handling instructions․
Installation and Setup
This section guides you through setting up your Frida Thermometer‚ from unboxing to installation․ Follow the steps to ensure proper setup for accurate measurements․
3․1 Unboxing and Initial Inspection
Start by carefully unboxing the Frida Thermometer and its accessories․ Ensure all components are included and undamaged․ Perform a visual inspection to check for any signs of damage or defects․ Gently remove any protective packaging and cleaning covers․ Wipe the device with a soft cloth to remove any dust or debris․ Verify that the screen is clear and functioning properly․ This initial inspection ensures your thermometer is ready for proper installation and use․ Proceed only if everything is in good condition․
3․2 Battery Installation
To power your Frida Thermometer‚ locate the battery compartment on the back․ Open it by sliding or unscrewing‚ depending on the model․ Insert the provided or recommended batteries‚ ensuring the positive (+) and negative (-) terminals align correctly․ Avoid mixing old and new batteries or using different types․ Close the compartment securely․ Finally‚ test the device by turning it on to confirm proper operation․ Proper battery installation ensures accurate temperature readings and optimal performance․ Refer to the manual for specific battery requirements․
3․3 Mounting the Thermometer
To mount the Frida Thermometer‚ choose a location with consistent temperature and minimal drafts․ Use the provided screws or adhesive strip to secure the device to a wall or surface․ Ensure the thermometer is level for accurate readings․ Avoid mounting near direct sunlight‚ heating vents‚ or moisture sources․ Once installed‚ tighten all screws firmly to prevent movement․ For outdoor use‚ ensure the mounting location is weather-appropriate․ Refer to the manual for specific mounting recommendations based on your model․ Proper installation ensures reliable and consistent temperature monitoring․

Understanding the Device
This section helps you familiarize yourself with the Frida Thermometer’s design‚ functionality‚ and operation․ Understanding its components and features ensures accurate temperature measurement and seamless operation․ Learn how to interpret readings‚ navigate settings‚ and utilize advanced functions for optimal performance․ This knowledge is essential for troubleshooting and maintaining your device effectively․ By mastering these basics‚ you can enjoy precise and reliable temperature monitoring in various environments․ Proper understanding enhances your overall experience with the Frida Thermometer․ Discover how to make the most of its capabilities․
4․1 Components of the Frida Thermometer
The Frida Thermometer consists of a sleek‚ durable design with a high-resolution LCD display for clear temperature readings․ The device includes a precision sensor probe‚ ensuring accurate measurements․ It features intuitive control buttons for easy navigation and settings․ The thermometer also comes with a wall-mounting bracket for convenient placement․ Inside‚ there is a battery compartment to power the device․ These components work together seamlessly to provide reliable and precise temperature monitoring․ Understanding each part helps in optimizing its performance and troubleshooting effectively․ Familiarize yourself with these elements to make the most of your Frida Thermometer․
4․2 Reading and Interpreting Temperature
The Frida Thermometer displays temperature readings on its LCD screen in either Celsius or Fahrenheit‚ depending on the selected unit․ The device provides accurate measurements‚ typically within ±0․5°C or ±0․9°F of the actual temperature․ Response time is quick‚ with updates every few seconds for real-time monitoring․ The screen may also indicate battery status or error codes․ To interpret readings‚ ensure the unit is set correctly and the sensor is placed appropriately․ For example‚ room temperature typically ranges from 18-25°C‚ while extreme temperatures may require special handling․ Always refer to the manual if readings seem unusual or inconsistent․

Operating the Thermometer
Operating the Frida Thermometer involves turning it on‚ selecting the temperature unit‚ and using the hold function for stable readings․ It ensures easy navigation and accurate measurements․
5․1 Turning On and Off
To turn on the Frida Thermometer‚ press and hold the power button until the display lights up․ Release the button once the device is active․ To turn it off‚ press and hold the same button until the display dims and turns off․ Ensure the thermometer is off when not in use to conserve battery life․ The device may also feature an automatic shut-off function‚ deactivating after a period of inactivity․ Always confirm the device is powered off to avoid unintended measurements․
5․2 Setting the Temperature Unit
To set the temperature unit on your Frida Thermometer‚ press and hold the power button until the device turns on․ Use the ‘Unit’ button to cycle between Celsius (°C) and Fahrenheit (°F)․ The current unit will be displayed on the screen․ Release the button once your preferred unit is selected․ The device will automatically save your selection and retain it for future use․ Ensure the unit is correctly set before taking measurements for accurate readings․ This feature allows you to customize the thermometer to your preferred temperature scale․
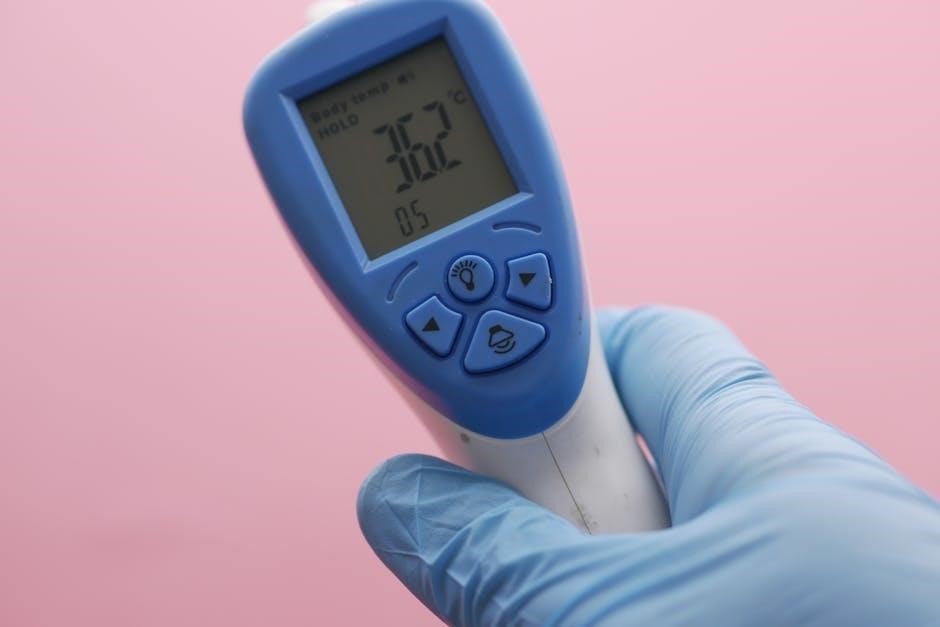
5․3 Using the Hold Function
The Hold function on the Frida Thermometer allows you to freeze the current temperature reading on the display․ To activate it‚ press the ‘Hold’ button located on the top of the device․ The display will show a lock icon‚ indicating that the reading is paused․ This feature is useful for recording measurements without needing to view the screen constantly․ To resume real-time temperature monitoring‚ press the ‘Hold’ button again․ The thermometer will then update to the current temperature․ Use this function for accurate and convenient data capture․

Maintenance and Care
Regularly clean the thermometer with a soft cloth and avoid harsh chemicals․ Replace the battery when necessary to ensure accurate readings and prolong device life․
6․1 Cleaning the Thermometer
Regular cleaning ensures accurate readings and prolongs the device’s lifespan․ Use a soft‚ dry cloth to wipe the thermometer’s surface․ Avoid harsh chemicals‚ abrasive materials‚ or excessive moisture‚ as they may damage the device․ For stubborn stains‚ lightly dampen the cloth with water‚ but ensure the thermometer is completely dry before use․ Never submerge the device in water or expose it to direct moisture․ Clean the screen gently to maintain visibility․ Always handle the sensor with care to avoid damage or contamination․
6․2 Replacing the Battery
To replace the battery‚ first‚ ensure the thermometer is turned off․ Open the battery compartment‚ usually located on the back‚ by sliding it open or using a screwdriver․ Carefully remove the old battery and insert a new CR2032 lithium battery‚ ensuring the positive side faces up․ Avoid touching the battery terminals to prevent contamination․ Replace the compartment securely․ Use only high-quality batteries to maintain performance․ If the battery is low‚ the device may display a low-battery indicator․ Replace the battery promptly to ensure accurate readings․ Test the thermometer after replacement to confirm proper function․

Troubleshooting

This section helps resolve common issues with the Frida Thermometer; Learn to identify error codes‚ address connectivity problems‚ and ensure accurate measurements․ Refer to specific solutions below․
7․1 Common Issues and Solutions
Addressing common issues ensures optimal performance of your Frida Thermometer․ Low battery? Replace or recharge it․ Inaccurate readings? Calibrate or reset the device․ Connectivity problems? Check sensor placement and ensure proper pairing․ Display not turning on? Verify power settings or battery status․ For persistent errors‚ refer to the error code guide or restart the device․ Regular maintenance and updates can prevent many issues․ If problems persist‚ contact customer support for further assistance․

7․2 Understanding Error Codes
The Frida Thermometer displays error codes to identify specific issues․ Code E1 indicates a sensor malfunction‚ while E2 signals low battery․ E3 points to connectivity problems‚ and E4 suggests calibration errors․ E5 indicates overheating‚ and E6 shows memory full․ Refer to the error code table for detailed explanations․ Addressing these codes promptly ensures accurate measurements and device longevity; If unsure‚ consult the troubleshooting section or contact support for assistance․ Regular checks can help prevent errors and maintain optimal performance․